When you project a slide deck created in Google Slides (or a PowerPoint that is now located in your Google Drive), you have the option to see and show only the slides themselves, or to also see the presenter's notes. If you select "Presenter View," the presenter notes appear in a separate window alongside the slides.
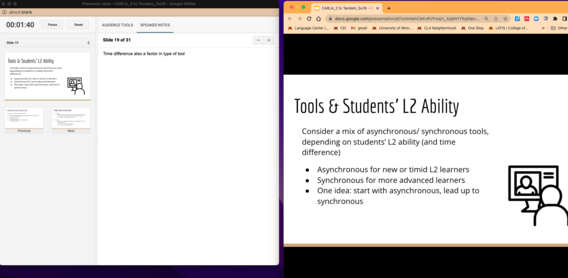
The problem occurs when you want to "hide" the presenter notes from your audience. Google slides doesn't provide a quick solution here. If your laptop is set to present everything that is on your laptop screen to the classroom system, the audience sees both the slides window and the presenter notes window, exactly as they appear on your laptop screen. They see what you see. The simple solution is to not use Presenter View, because you have your "notes" on paper or you are so familiar with your slides that you don't need any notes at all.
If you are dependent on the notes or want to have a preview of the next slide, then you will want to use Presenter View. This is not as simple, but it is possible with some additional set-up on your laptop when you are connected to the classroom system. You will need to change the display setting so that the image on your screen is no longer mirrored onto the projector screen. By changing display settings, you will see your presenter notes on your laptop, but your audience will see the slides on the projector screen. You each have a different view.
How do you change the display settings?
How to stop mirroring screens (i.e. display a different, not the same, image on two different screens) For more information, see the previous tip Using more than one screen.
On a Windows computer
- Connect your computer to a projector or second screen
- Open Display Settings
On a Mac computer
- Connect your computer to a projector or second screen
- Open System Preferences under the apple menu
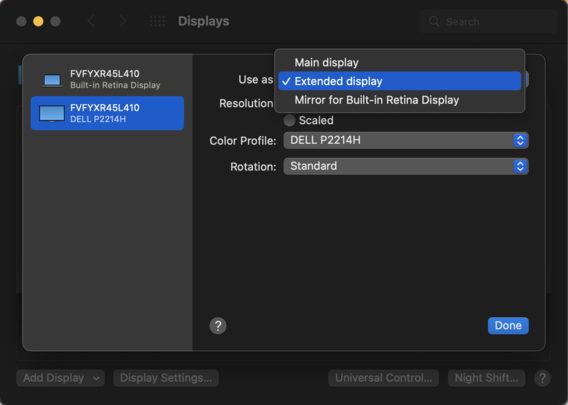
- Click Displays
- Click Display Settings
- Click on the laptop icon, then set "Use As" to Main Display
- Click on the icon of the other screen, then set Use As to Extended Display
- Click Done
Now you are ready to position your presenter notes on the laptop screen and the slides on the extended display (i.e. the projector screen).
- Open your Google Slides presentation
- Click on Presenter View
- Drag the window with the slides to the side, off your laptop screen, and then watch it appear on the large projector screen (i.e. the extended display)
- Resize and Position the Presenter View window on your laptop according to your own preferences
Sharing the screen with a remote audience
If you also have a Zoom audience, you will need to share a screen with them. After clicking the green "Share Screen" icon in Zoom, select the icon representing the extended display. On a Mac, this is called Desktop 2. Now your remote audience will see the same screen as your physical audience, while you see the presenter notes on your laptop.